
Episode 4: Deploying Code to Linux From TeamCity
We setup TeamCity to deploy the latest build to Linux using SSH. TeamCity is so slick, it can make anyone look like a wizard. Even us! We’re ready to deploy our code to a linux based development environment. Previously, we built our code in TeamCity and stored the artifacts. We also created a SSH key for our development server. Now, TeamCity can deploy artifacts to the server using the SSH key for authentication.
We use TeamCity because we already have our build artifacts there, TeamCity supports SSH and we’d rather not add anything else to our tech stack. And really, TeamCity is pretty cool!
Storing SSH Keys in TeamCity
Our server has already been configured to trust the SSH key we created. TeamCity supports storing SSH keys so they can be used in SSH Upload and SSH Exec build steps. Adding keys is buried in the TeamCity Project Configuration screens:
-
Find SSH Key Config
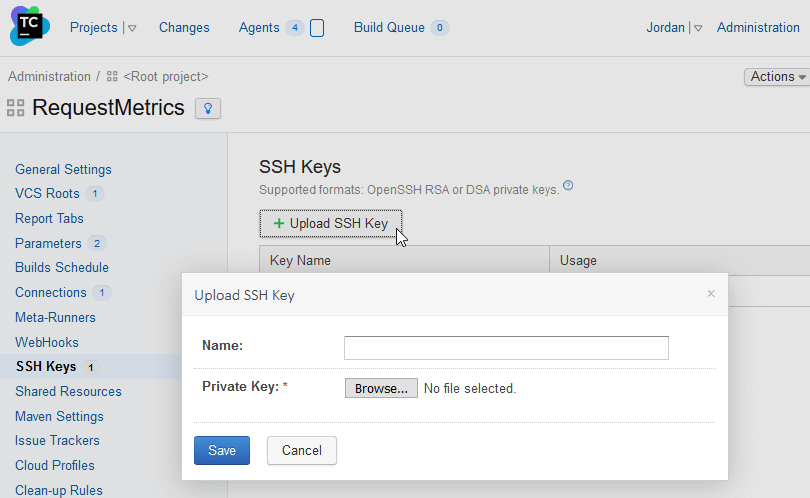
In the TeamCity UI, navigate to: Administration -> Your Project Name -> SSH Keys
-
Upload SSH Key
Click “Upload SSH Key” and select the private key you wish to use:
Deploying From TeamCity Using SSH
We can place our code on the Linux server by using TeamCity’s built-in SSH Upload Runner. We tar the files first because it is slower to SSH many files instead of one file of the same size. We then use the SSH Exec runner to swap the new code into place:
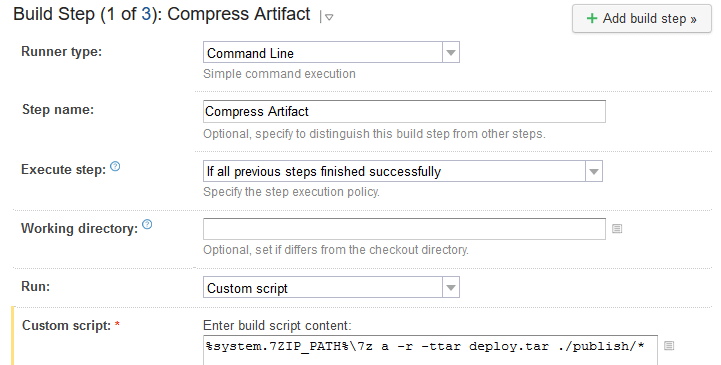
- Compress Artifacts Step
-
We use 7zip because our TC instance is hosted in Windows:
%system.7ZIP_PATH%\7z a -r -ttar deploy.tar ./publish/* -
The Compress Command Line step looks like this:
-
- Upload Artifacts Step
- Specify the server and a temporary path to upload to.
- Select The SSH key you previously uploaded to TeamCity:
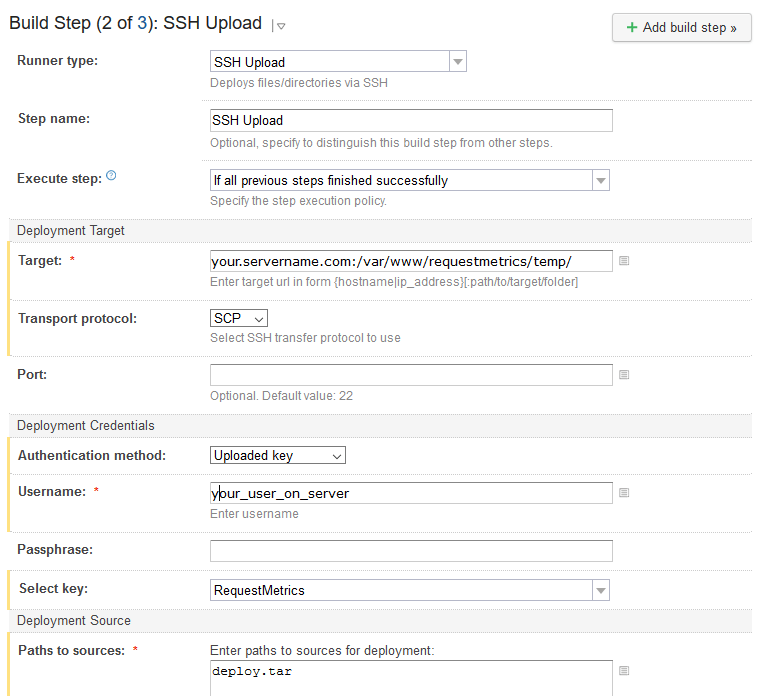
- Note: Ensure all server directories already exist!
- Go Live Step
- Using SSH Exec, extract the new files from the temporary directory and swap them into the live directory:
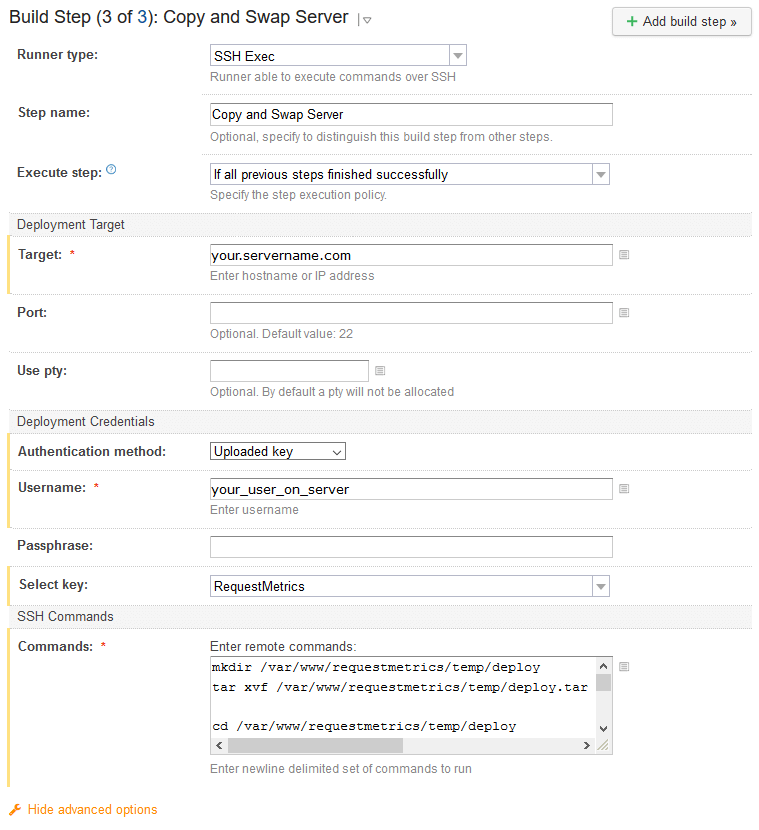
- Our Exec script is a bit gross, but works well:
- Using SSH Exec, extract the new files from the temporary directory and swap them into the live directory:
# Extract the tar
mkdir /var/www/requestmetrics/temp/deploy
tar xvf /var/www/requestmetrics/temp/deploy.tar -C /var/www/requestmetrics/temp/deploy

# Fix file permissions that Windows breaks
find /var/www/requestmetrics/temp/deploy -type d -exec chmod 755 {} +
find /var/www/requestmetrics/temp/deploy -type f -exec chmod 644 {} +
# Make the binary executable
chmod +x /var/www/requestmetrics/temp/deploy/RequestMetrics.Web

# Move new files into the live directory and cleanup temp
rm -rf /var/www/requestmetrics/app/*
mv /var/www/requestmetrics/temp/deploy/* /var/www/requestmetrics/app
rm -rf /var/www/requestmetrics/temp

# Restart the application to load the new code
systemctl restart app.requestmetrics.com
We have a working build, a working deploy and a working application! Next, we’ll decide what kind of SSL certificate to use for our site. We’ll also continue to automate our server provisioning with Ansible.

